


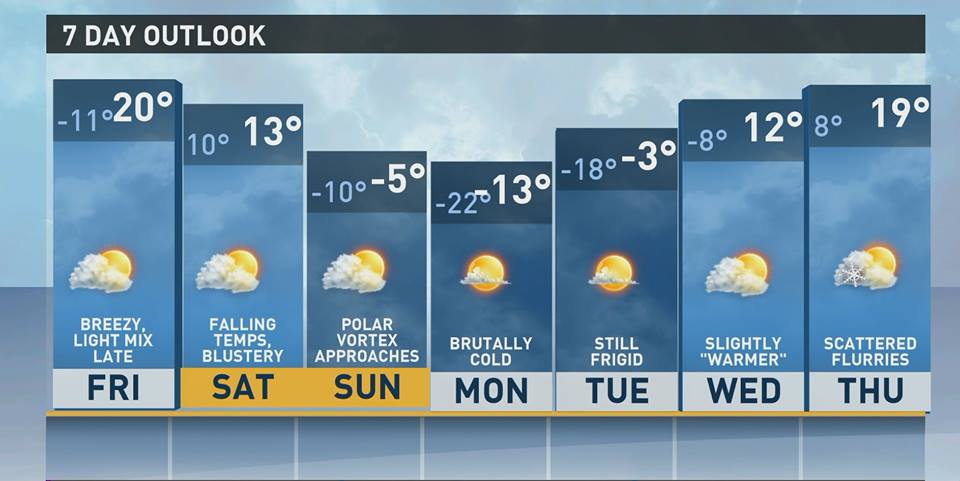
Wow it is Friday already, the first one of the new year. I have been doing pretty good so far this year (only three days in but I take it as a victory!) on staying on top of most of my blog duties. I have not yet set a mail challenge for this year but I plan to give it a little thought and will take care of it this weekend. As well as some other clean up and such work. With that out of the way, time to take a look at the Friday Crafty corner..and today I am focusing on what you can do with kids. Winter break (almost over I know) and Winter in general can be tough especially with cold snaps like those coming to some this weekend (I had to attach a picture!) so here are some crafts you can do with the kids to keep them occupied.
Starry, Starry Night
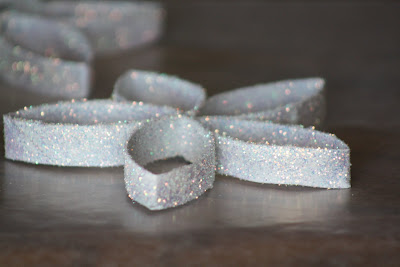
A real snowflake can be hard to catch, but with these toilet-paper rolls disguised as sparkly, snowy crystals, the kids can hang on to ‘em forever!
Good for ages: 4 and up
What you’ll need:
– empty toilet paper rolls (each roll makes about one star)
– scissors
– white paint
– glue
– clothespins
– white glitter
How to make it: Grab some old toilet paper rolls, and cut them into ¾” rings. Glue the tips of five rings together, and use a clothespin to hold them together as they dry. Then paint each one white. While it’s still wet, sprinkle with glitter to get the Christmas shimmer of a starry night.


4. Do this all the way around until you have your desired shape (5 rings make a star and 6 make a flower). Let dry completely.


6. Sprinkle it with glitter lay it out on wax paper or somewhere clean, cool, and dry and let dry for an hour.
7. Grab a cup of your favorite beverage and enjoy the work you did.